EazyFilter now supports metadata in addition to taxonomy. Let’s see how to use Meta in EazyFilter:
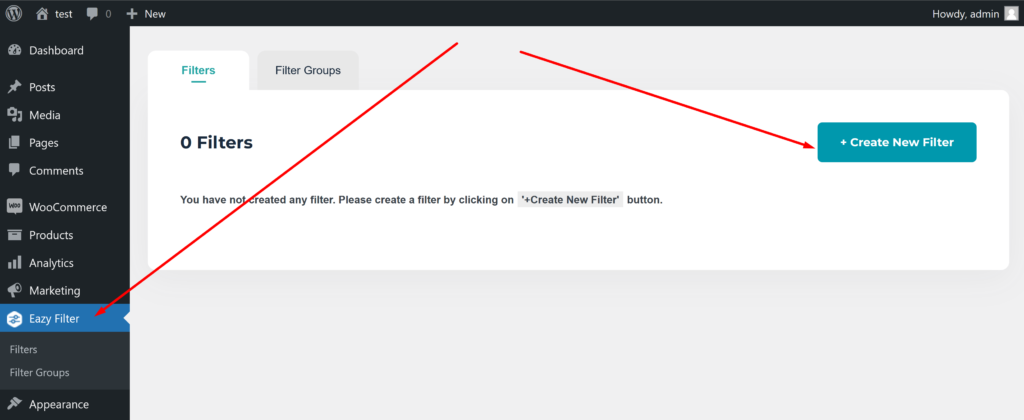
First let’s create a filter. For this tutorial we’ll create a meta button choose. From dashboard click on the “Create New Filter” button:
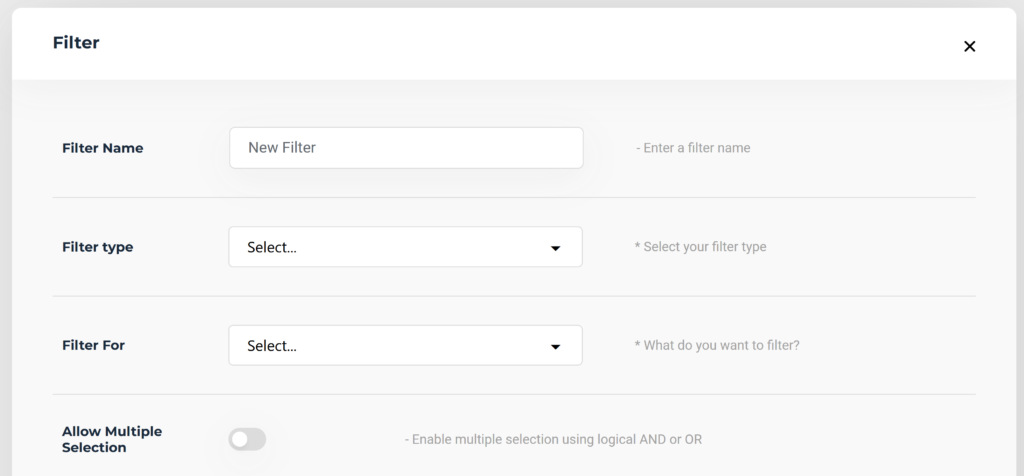
Now we need to populate our filter:
Notice that we’ve chosen Filter For “Meta” and Choose Meta “Stock Status” here.
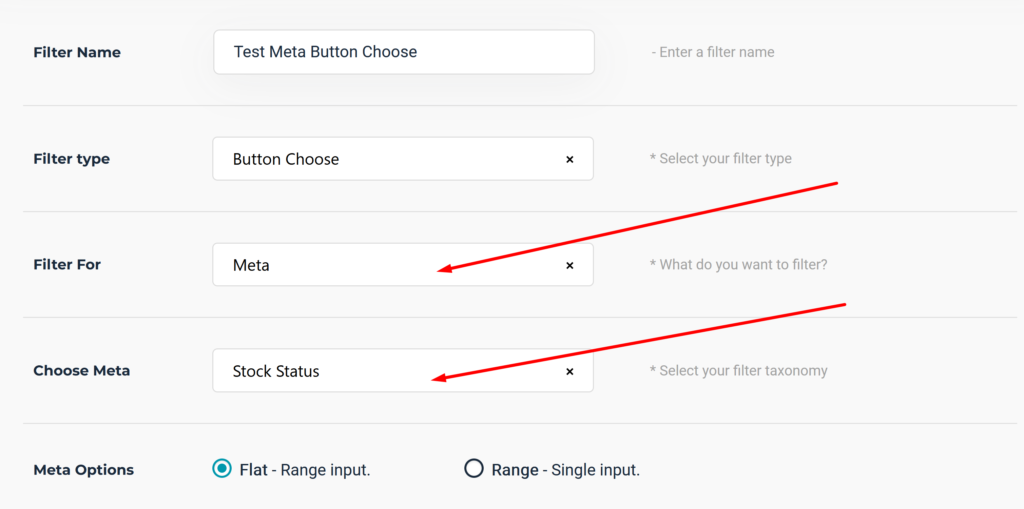
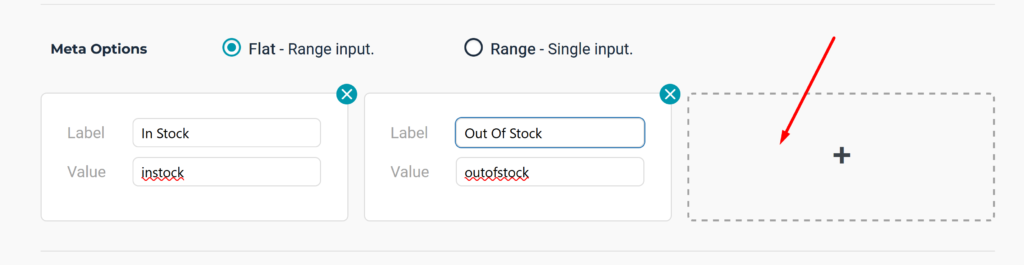
We can select meta option as Flat or Range. Let’s use flat for now.
Next we need to use meta Label and Value. For our product catalogue our meta Value is “outofstock” “instock” among various others. Label is basically the label of the button that you want to display.
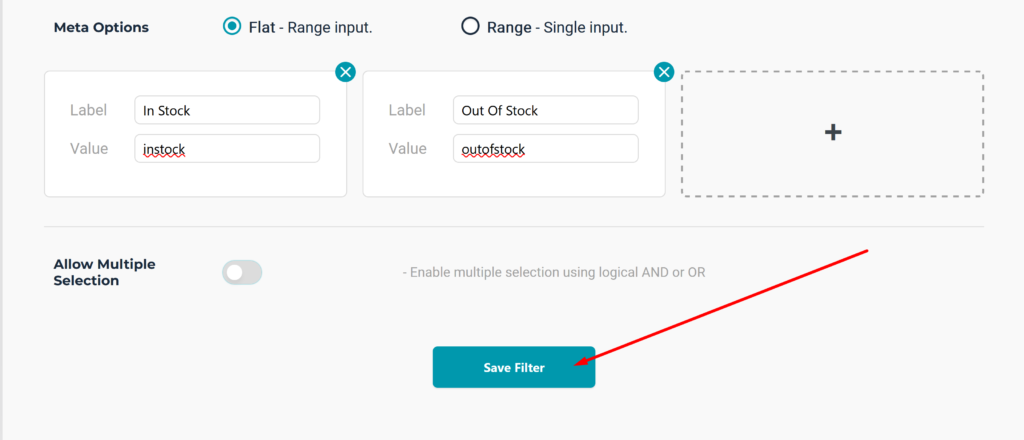
Once you are done with your meta filter press Save
Using Meta Filter With Elementor:
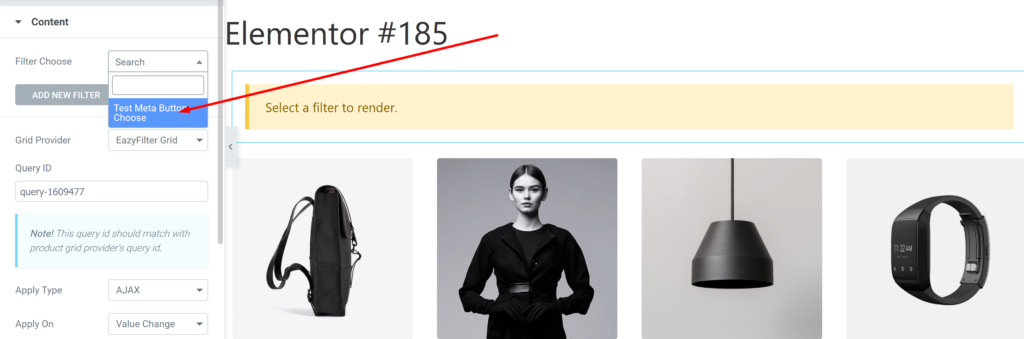
To use the newly created filter with Elementor create a new page in Elementor with existing product grid and drag the Button Choose widget and select our newly created widget from the dropdown:
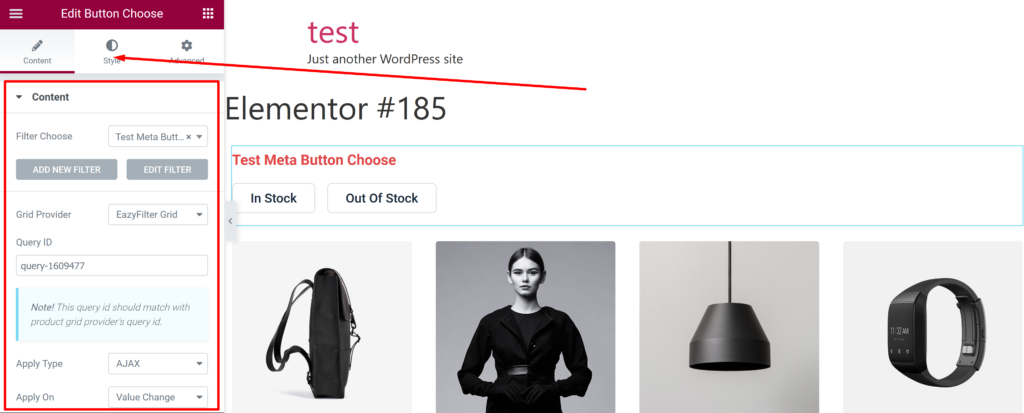
Now we have our meta filter ready. You can control various content from here or style the widget. We’ve made our text color red.
Once you are done with editing and customizing publish your filter.
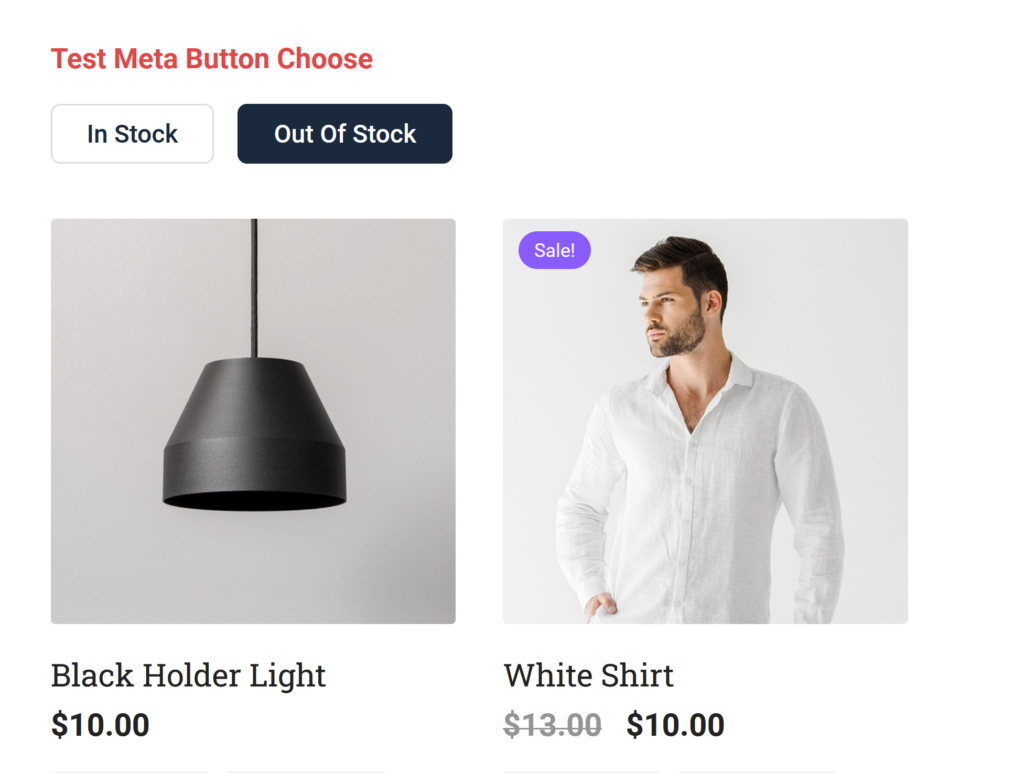
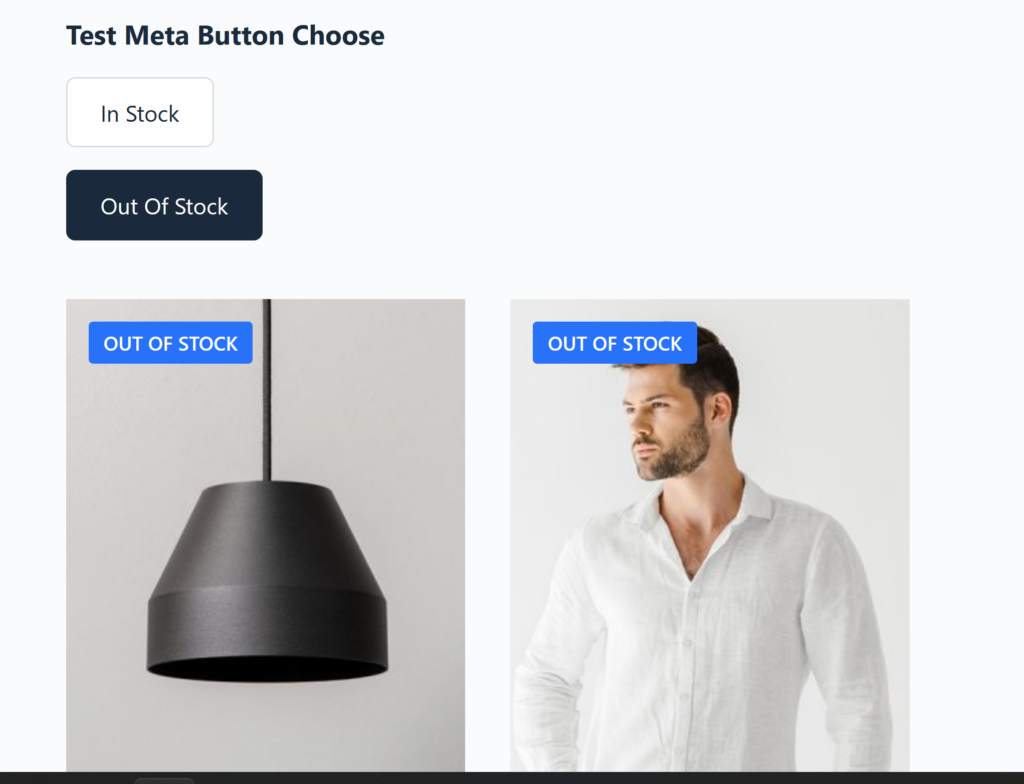
We can see the filter is working.
Using Meta Filter With Shortcode:
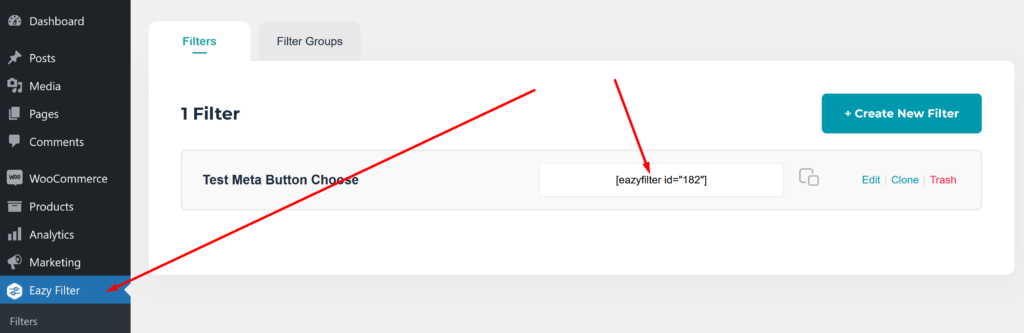
From WordPress dashboard we can see shortcode for our newly created filter. First, let’s copy the shortcode
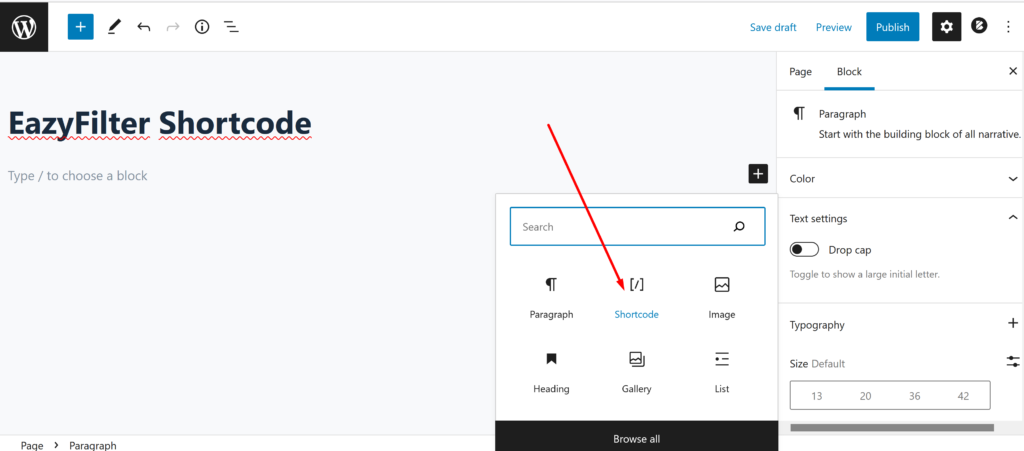
Create a new page and use the shortcode block here:
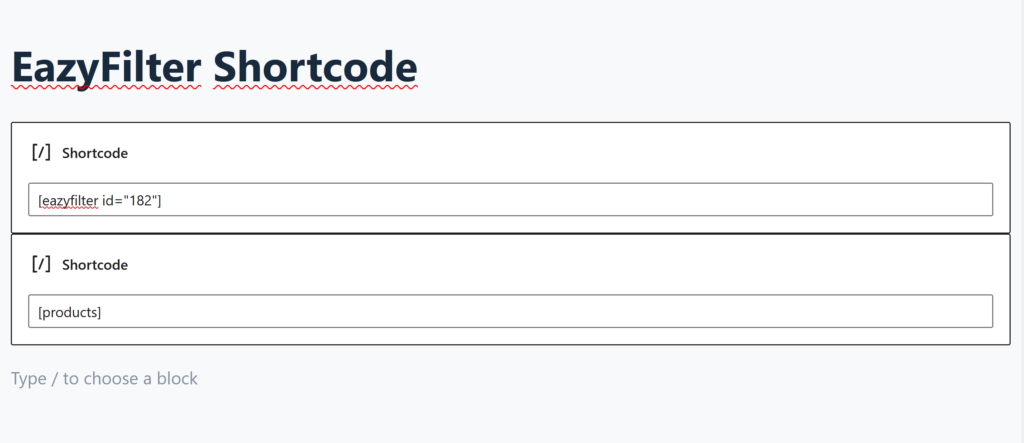
Write the word “products” here. This will create our product view. To use our filter we need to use the shortcode we copied previously and paste into this box. The final output should look like this:
Now we can see the filter on our page.