In order to use the Color Swatches widget, create a new page from wp-admin>pages:
![This image has an empty alt attribute; its file name is image-41-1024x370.png](https://eazyplugins.com/wp-content/uploads/2022/01/image-41-1024x370.png)
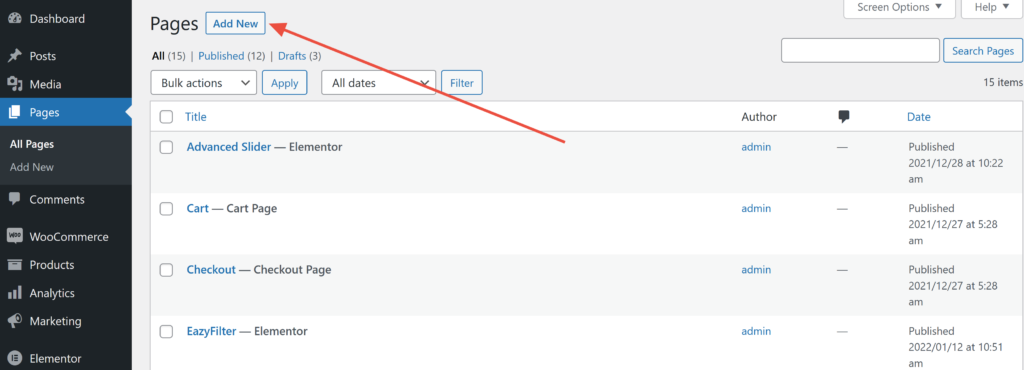
Now edit the page with Elementor:
![This image has an empty alt attribute; its file name is image-42-1024x356.png](https://eazyplugins.com/wp-content/uploads/2022/01/image-42-1024x356.png)
Type EazyFilter in the search box and drag the Color Swatches widget. Here we already have the product widget that we created from before:
![](https://eazyplugins.com/wp-content/uploads/2022/03/image-28-1024x455.png)
Now we have to select a filter to render:
![](https://eazyplugins.com/wp-content/uploads/2022/01/image-69-1024x417.png)
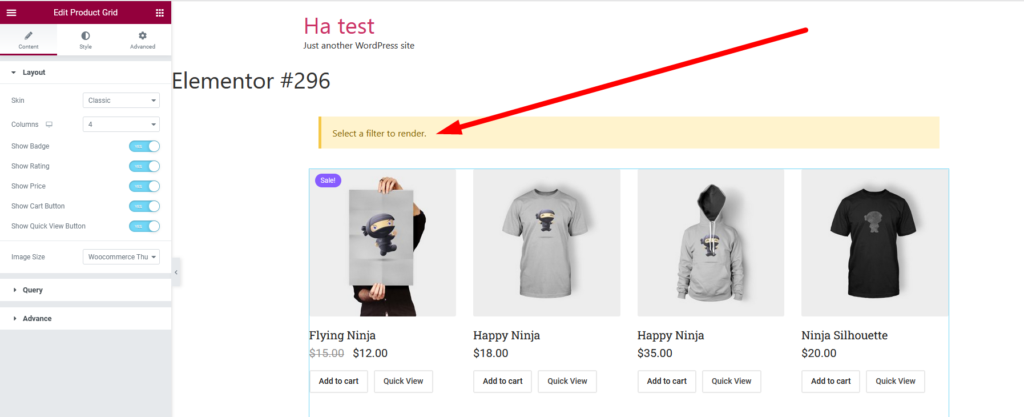
Now you can either create a new filter by clicking the highlighted button or use an existing filter. For this tutorial we will use an existing Color Swatch filter:
![](https://eazyplugins.com/wp-content/uploads/2022/01/image-70-1024x401.png)
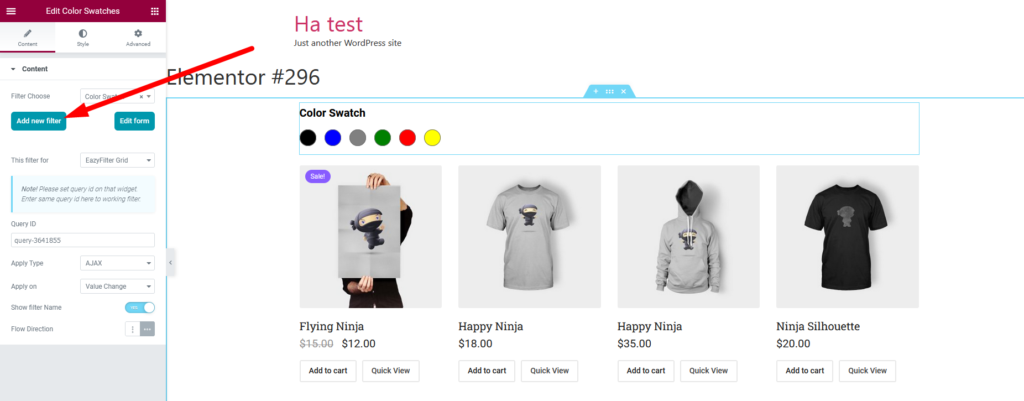
After selecting the grid and choosing appropriate filter you now have the filter ready for use:
![](https://eazyplugins.com/wp-content/uploads/2022/01/image-71-1024x419.png)
On the left side, you have control over Query ID, Apply Type, Apply on, Show filter Name & Flow Direction:
![](https://eazyplugins.com/wp-content/uploads/2022/01/image-72-1024x412.png)
When you press publish you are ready to use your freshly minted filter:
![](https://eazyplugins.com/wp-content/uploads/2022/01/image-73-1024x299.png)